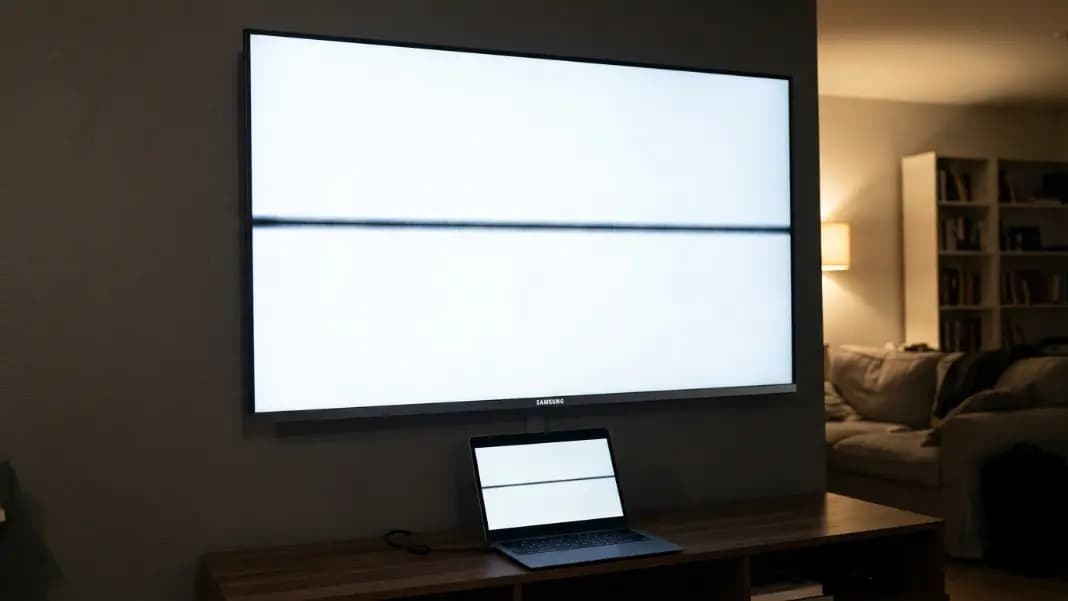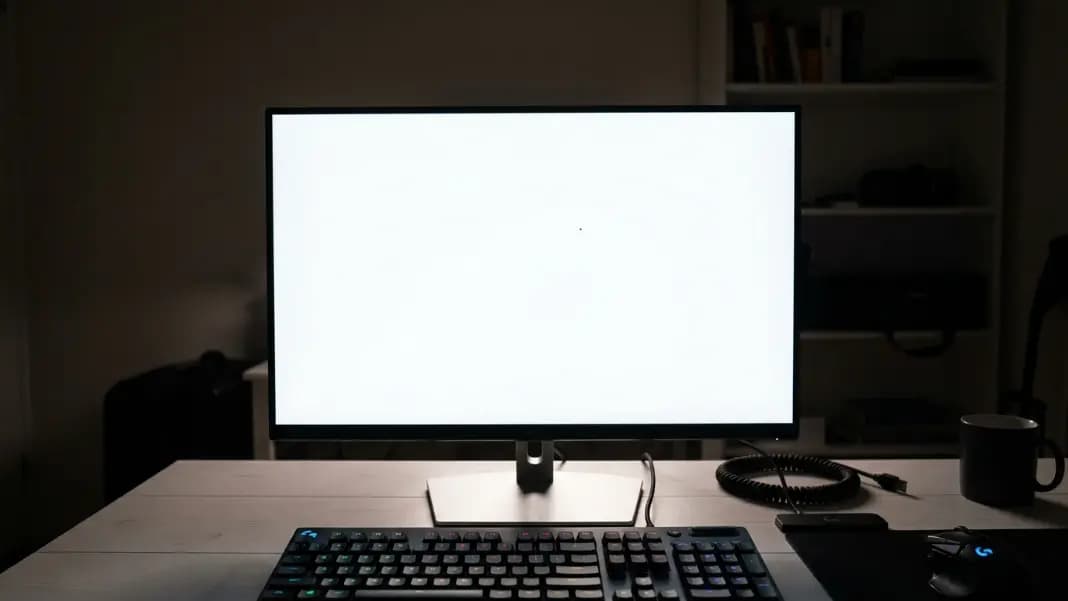
You noticed a small black dot on your screen. You moved windows around it for a week. You wiped the panel twice. The dot never moved and the cloth passed straight over it without any resistance. That is the specific experience of having a dead pixel on a monitor, and it is enough to confirm what you are dealing with before you run a single test.
Knowing it is a dead pixel and knowing how to document it for a warranty claim are two different things. Run the dead pixel test in your browser on the monitor you want to inspect. Press F11 so the solid colors fill every centimeter of the screen. That test will tell you exactly what type of defect you have and which part of the panel is affected.
This guide explains what a dead pixel on a monitor actually looks like at different resolutions and viewing distances, how each background color in the test exposes a different type of failure, how to test a second monitor in a dual-display setup, and what the manufacturer's threshold is before a warranty replacement becomes possible.
What a Dead Pixel on a Monitor Looks Like at Normal Viewing Distance
A dead pixel appears as a perfectly sharp black dot. The edges are defined at the exact boundary of a single pixel cell. There is no blurriness, no halo, no gradual fade into the surrounding image. It is a geometric square at the pixel level that your eye perceives as a point because individual pixels are too small to register their square shape from normal distance.
The dot is visible on every light background. White, gray, red, green, blue, yellow, any background brighter than the pixel itself makes the dead cell stand out. The only background where a dead pixel disappears completely is solid black, because the surrounding screen is the same shade as the dead cell.
Position matters a great deal to how noticeable the defect is. A dead pixel near the center of a 24-inch 1080p monitor at 92 pixels per inch is something most people notice within the first few minutes of use. The same defect in the bottom-left corner of the same panel, under the taskbar, can go undetected for months. A corner defect near the bezel often falls just inside the frame at certain angles and disappears during normal work.
Understanding what is a dead pixel at the hardware level helps clarify why the appearance is so precisely defined. The cell itself has failed electronically. The transistor that controls light passing through that liquid crystal cell is no longer functioning, so no light reaches the front of the panel at that location. The surrounding pixels have nothing to do with the failure and continue working normally, which is why the boundary is so sharp.
How to Run the Dead Pixel Test on a Desktop Monitor
Open the dead pixel test in the browser that is currently displayed on the monitor you want to check. This step matters. If you open the tool on your primary monitor and your secondary monitor is the one you suspect, you will fill the wrong screen.
Press F11 to enter fullscreen mode. The test needs to cover the entire screen surface, including the areas behind the browser toolbar and the system taskbar. If any part of the screen is covered by a toolbar or the desktop taskbar, switch to fullscreen before you start scanning.
Dim the room. Ambient light reflecting off the panel surface makes dark defects harder to see. If you are testing during the day, pull the curtains or position yourself so the window is not behind you. A darker room makes the test significantly more reliable, especially on matte-finish monitors where the anti-glare coating scatters light across the surface.
Cycle through each solid color and spend at least five seconds on each one. Look at the screen methodically from corner to corner rather than staring at the center and hoping something catches your eye. Start at the top-left, move across to the top-right, then sweep down in horizontal bands. This systematic approach finds defects near the edges that casual glancing misses.
The full process, from opening the browser to completing all five colors, takes about three minutes. That is enough time to find any defect the panel has. The dead pixel test guide covers the process in more detail if you want a step-by-step walkthrough with screenshots.
What Each Background Color Reveals on a Monitor Screen
Each of the five test backgrounds targets a different kind of pixel defect. Running only white and black misses defects that only appear on a specific color.
White is the primary background for finding dead pixels. Any pixel that is completely non-functional shows as a black dot against a white field. White produces the highest possible contrast between the failed cell and the surrounding panel. If you have one test to run, white is the most important.
Black reveals stuck and hot pixels. Any pixel that stays lit on a fully dark background is failing in the opposite direction from a dead pixel. Stuck pixels show as fixed colored dots, typically red, green, blue, cyan, magenta, or yellow. Hot pixels show as bright white dots. A black background makes these stand out clearly because the surrounding display is completely dark.
Red exposes subpixel failures that are invisible on white and black. Each pixel on your monitor is made of three subpixels: red, green, and blue. If the red subpixel fails while green and blue still work, the pixel displays cyan on a white background, which can blend in with white. On a solid red background, that pixel shows as a clearly visible cyan dot because it is emitting green and blue without the expected red.
Green targets failed green subpixels. A pixel missing its green subpixel emits red and blue light, showing as a magenta dot on a green background. This is a defect that looks nearly white on a white background and is very easy to miss without the green test.
Blue catches failed blue subpixels. A pixel missing blue emits red and green, showing as a yellow dot against a solid blue field. Yellow on blue is one of the highest-contrast combinations available and makes this type of subpixel failure immediately obvious.
Testing all five backgrounds is the approach recommended in the dead pixel white and black screen guide, which goes deeper into the specific visual signatures of each color combination.
Dead Pixels on 4K Monitors: Pixel Size and Viewing Distance
A 27-inch 4K monitor runs at 163 pixels per inch. A 27-inch 1080p monitor runs at 92 pixels per inch. Both have the same physical screen size, but the 4K panel packs four times as many pixels into the same area, making each individual pixel less than half the width and height of a pixel on the 1080p panel.
The practical consequence is that a single dead pixel on a 27-inch 4K display is often not visible from a normal desk distance of 60 to 70 centimeters. The dot is too small for the eye to resolve at that distance without actively searching. You can sit at your desk for months without noticing a 4K dead pixel that would have been obvious on a 1080p screen.
This creates a specific risk when buying a 4K monitor. Retailer return windows run 15 to 30 days. If you do not test the monitor at close range within that window, you may discover a dead pixel after returns are no longer accepted.
The test distance for 4K monitors should be 30 to 40 centimeters, which is roughly the distance from your face to the screen when you lean forward with intent to inspect it. From that distance, a single dead pixel on a 27-inch 4K panel becomes visible. Run the white background test first from this distance, scanning across the full panel surface systematically.
The same logic applies to 32-inch 4K monitors, which run at 138 PPI, and 24-inch 4K monitors, which run at 183 PPI. All of them require closer inspection than 1080p equivalents to find defects during the return window.
How to Test a Second Monitor in a Dual-Display Setup
Testing a second monitor requires moving the browser window to that screen before entering fullscreen mode. This is the step most people skip, and it results in the wrong screen going fullscreen while the monitor they actually want to test remains at normal desktop view.
Drag the browser window entirely onto the monitor you want to test. Make sure the window is fully on that screen and not spanning both displays. Then press F11. The fullscreen mode will cover only the monitor where the browser window is located.
If you use Windows 11 or Windows 10, you can confirm which screen is active by checking the window title bar location before pressing F11. The browser toolbar will be visible on the screen where the window lives. Once you enter fullscreen, the toolbar collapses and the test fills that screen.
For a side-by-side dual-monitor setup where both screens are the same model, test each one individually. Pixel defects are panel-specific. A monitor that passes the test does not indicate anything about the other monitor from the same batch. Run the full five-color sequence on each screen separately.
If you have extended display mode active, the browser will stay on the screen where you placed it. If you are using duplicate mode, the same image appears on both screens and you cannot isolate one for testing. Switch to Extended Display in Windows Display Settings before running the test on a specific monitor.
Dead Pixel vs Backlight Bleed vs IPS Glow on Monitors
Not every visual anomaly on a monitor is a dead pixel. Two other common defects are frequently confused with pixel failures because they are also most visible against dark or solid backgrounds.
Backlight bleed appears as soft, hazy patches of light along the edges of the screen when displaying a dark background. It is caused by the backlight leaking around the edges of the LCD panel, rather than by any failure at the pixel level. Backlight bleed has diffuse, undefined edges. It fades gradually into the dark background rather than stopping at a sharp boundary. It is most visible in the corners and along the edges, not in the center of the panel. A dead pixel has a precisely defined edge and can appear anywhere on the screen, including the center.
IPS glow is a property of IPS panel technology. It appears as a brightening in the corners of the screen that shifts when you change your viewing angle. Standing to the left of the monitor makes the left corner appear brighter; standing to the right shifts the glow to the right corner. IPS glow is caused by the way IPS panels transmit light at shallow angles and is present to some degree in virtually all IPS displays. It is not a defect in the same sense as a dead pixel and does not qualify for warranty replacement.
A dead pixel does not change with viewing angle. It does not have soft edges. It does not concentrate near the corners or edges. It is a fixed-position, sharp-edged, completely black dot that stays in the same location on every background that is brighter than black. If what you see moves, fades, shifts, or changes when you change your viewing angle, it is not a dead pixel.
The dead pixel policy guide explains what qualifies for a warranty claim and what does not, including how manufacturers distinguish between dead pixels, backlight bleed, and IPS glow in their support policies.

When a Monitor Dead Pixel Qualifies for Warranty Replacement
Whether a single dead pixel on a monitor qualifies for warranty replacement depends on the manufacturer, the monitor model, and where the defect is located on the panel.
Standard consumer monitor brands, including Samsung, LG, AOC, and Acer mid-range lines, follow ISO Class II tolerances. Class II permits approximately two dead pixels and two stuck pixels per million pixels before the panel is considered out of specification. On a full HD 1080p monitor with about two million pixels total, that means a single isolated dead pixel in the corner of the screen technically falls within the acceptable defect count. The manufacturer may decline a warranty replacement on that basis.
Dell UltraSharp monitors carry the Dell Premium Panel Guarantee, which covers a single bright stuck pixel in any location on the screen. Note that the guarantee specifically covers bright pixels, meaning stuck or hot pixels, rather than dark dead pixels. Dell's consumer-grade monitors without the UltraSharp designation follow standard Class II tolerances.
ASUS ProArt monitors offer a similar premium guarantee on selected models. Check the specific model's product page under the warranty section before assuming coverage applies.
The most consumer-favorable situation is the retailer return window. During the first 15 to 30 days after purchase, depending on the retailer's policy, a single dead pixel anywhere on the screen is sufficient reason for a return or exchange. The retailer's return policy applies regardless of the manufacturer's defect threshold. If you find a dead pixel within the return window, return the monitor directly to the retailer. You do not need the manufacturer's approval.
If you are past the retailer return window but within the manufacturer warranty period, document the defect with a photograph taken against a white background, note the screen location precisely, and contact manufacturer support. A dead pixel near the center of the screen is a stronger claim than a corner defect. Multiple dead pixels strengthen the case further. The dead pixel test guide has specifics on documenting defects for warranty submissions.
To confirm your exact defect type and screen location before filing a claim, visit the developer section and run the full dead pixel test on the affected monitor. The results give you the information you need to describe the defect accurately to the manufacturer.