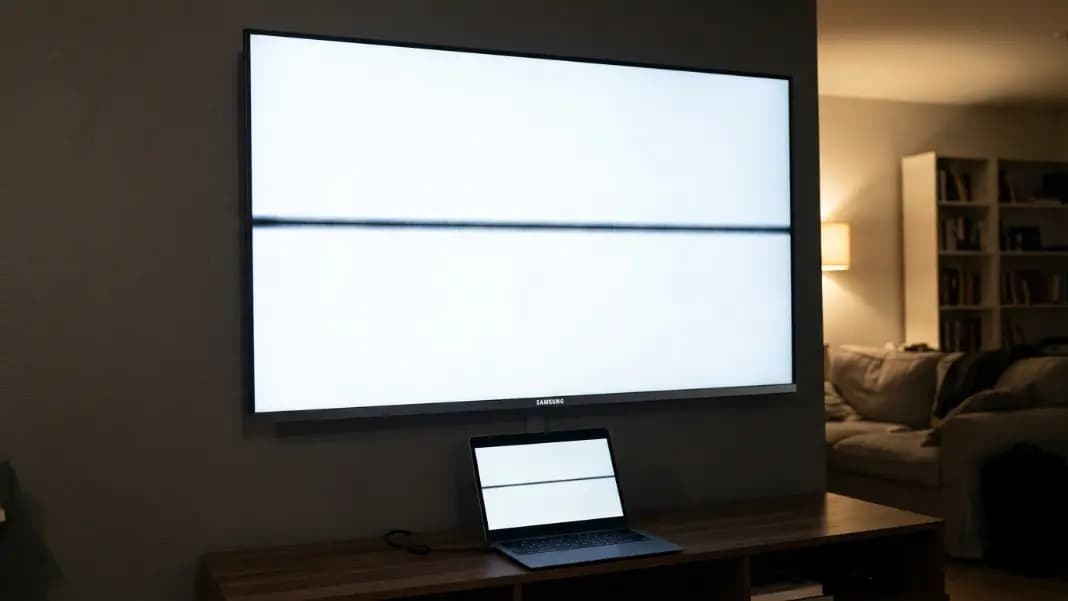
Buying a new monitor and finding a dead pixel on day one is frustrating. Finding one after the return window closes is considerably worse. A quick test before you commit to a display takes under five minutes and removes all doubt about what you received.
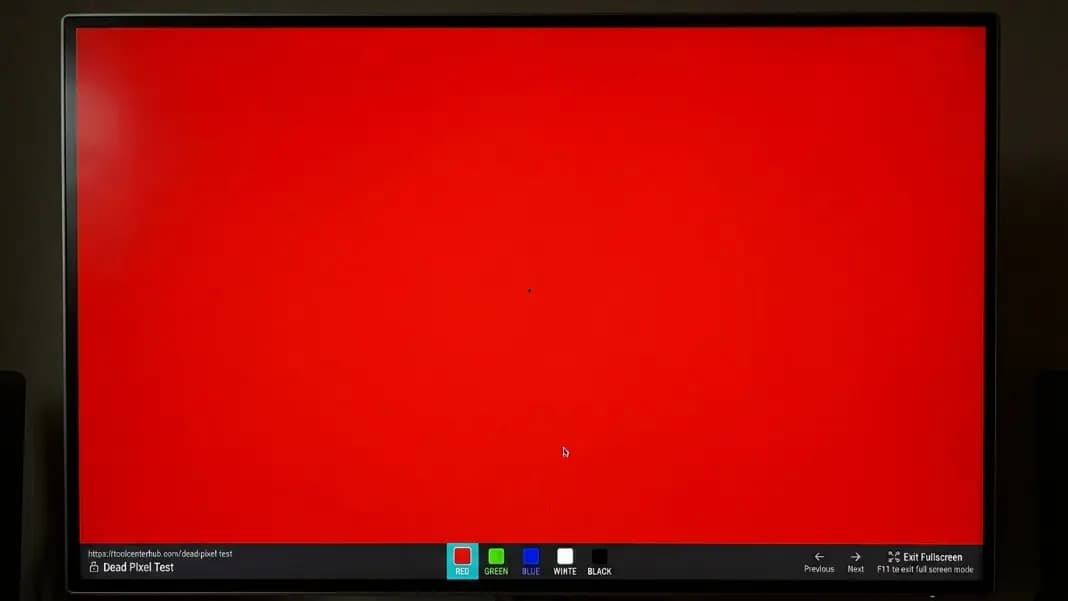
The dead pixel test at ToolCenterHub cycles your screen through solid colors in fullscreen mode. Each background reveals a different type of defect that would be invisible under normal desktop use. Run it on any new monitor before you open the box fully, and again after setup if you bought online and cannot inspect in person.
This guide covers how each type of pixel defect works, how to read the test results, what the ISO standard says about acceptable defect counts, and what your options are when a monitor fails.
Three types of pixel defects
Not every dot on your screen is the same kind of problem. The distinction between dead, stuck, and hot pixels matters because they have different causes, different visual signatures, and different options for resolution.
A dead pixel receives no power at all. The liquid crystal cell has stopped functioning and the pixel is permanently black. It appears as a dark dot on any bright background and is invisible on a black screen. Dead pixels cannot be fixed in software because the physical component is no longer working. The cell itself has failed.
A stuck pixel is powered but frozen in a single color. The transistor that normally cycles the pixel through different sub-pixel combinations has locked in one state. Stuck pixels show as a single bright dot, typically red, green, blue, cyan, magenta, or yellow, depending on which sub-pixel combination is stuck. They are visible on any background that does not match the exact color they display, and they disappear only against that specific color.
A hot pixel is similar to a stuck pixel but is always fully lit at maximum brightness. It appears white or very bright regardless of the surrounding content. Like stuck pixels, hot pixels are caused by transistor failures and can sometimes respond to rapid color-cycling treatment.
The practical difference in outcomes: stuck and hot pixels have a meaningful chance of being fixed. Dead pixels are essentially permanent. If the test shows a black dot, plan for a warranty claim. If it shows a colored dot, try the software fix first.
How to run the dead pixel test
Open the dead pixel test tool in your browser and click the fullscreen button. The tool will walk you through solid black, white, red, green, and blue screens in sequence.
Give yourself five to ten seconds on each color. Do not rush. Your eyes need a moment to adjust to the flat background and pick up any anomaly against it. Quickly scrolling through the colors misses defects that take a second to register visually.
Testing conditions matter before you begin: Run the test at maximum display brightness with the room lights dimmed or off. ISO 9241-307 documents that ambient light reflections account for up to 40% of pixel defects missed during consumer-level inspections — a defect fully visible in a dark room can be masked by overhead lighting reflecting off the panel surface. Turn off any night-light or blue-light filter settings before starting, as these shift background colors and can hide color-channel defects. A test run in a bright room at reduced brightness has a meaningful chance of missing what would otherwise be an obvious stuck pixel.
Here is what each background reveals:
Black: Any pixel that glows in any color against a fully dark screen is a stuck or hot pixel. A black background is the easiest surface for finding bright defects because there is no competing light around them.
White: Any pixel that stays black when the whole screen is white is a dead pixel. This is the definitive test for permanently dark dots.
Red: Any pixel that appears as a different color against a red background is a defect. A stuck green sub-pixel will show as a yellow dot on red. A stuck blue sub-pixel will show as a magenta dot.
Green: Blue or red stuck sub-pixels stand out clearly here. A sub-pixel stuck in red shows as a yellow dot on green.
Blue: A stuck red sub-pixel shows as magenta against blue. A stuck green sub-pixel shows as cyan. Any dot that does not match the blue background is worth noting.
Running through all five colors covers every possible defect type. A pixel problem invisible on one background becomes obvious on another. A defect you might miss under normal desktop conditions will be unmistakable on the matching solid color background.
Where to look during the test
The center of the screen is the most important area to check and the easiest to examine, but defects can appear anywhere on the panel.
Pay particular attention to the areas within about two centimeters of each edge. Manufacturing pressure during assembly can damage pixels near the frame. Defects in this zone are common on lower-quality panels and often fall just inside the bezel where they are hard to notice during everyday use.
Corners accumulate more physical stress during transit and handling than the middle of the panel. A monitor that was stored or shipped incorrectly may show damage concentrated in one corner.
If you see something unusual, approach the screen closely. Small defects that look like dust from a distance reveal their true color up close. Conversely, stepping back one to two feet from the screen while viewing the bright color tests can make faint stuck pixels easier to spot because the contrast between the pixel and its surroundings becomes more noticeable.
The ISO standard and what it means for you
The ISO 13406-2 standard, now updated and absorbed into ISO 9241-307, classifies display panels into quality classes based on how many defective pixels they allow per million. These classes define what is considered acceptable from the factory.
Class I allows zero defective pixels of any type. Class II allows up to 2 dead pixels and 2 stuck pixels per million pixels. On a 1080p monitor, that is roughly 2 million pixels total, so Class II permits approximately 4 dead pixels and 4 stuck pixels before the manufacturer considers the panel within specification. Class III and IV allow considerably more.
Most consumer monitors fall under Class II. Premium lines from Dell UltraSharp, ASUS ProArt, and LG UltraFine typically carry a zero dead pixel guarantee as an explicit marketing commitment, which holds the panel to a stricter standard than Class I in practice.
What this means when you file a claim: a single dead pixel in the corner of a mid-range monitor may technically fall within the manufacturer's acceptable defect count. A cluster of dead pixels near the center of the viewing area is a much stronger case for replacement. Multiple stuck pixels across different screen zones, or any defect on a premium panel with a zero dead pixel guarantee, should result in a replacement.
Manufacturer policies set specific numeric thresholds that differ from the ISO class definitions. Dell's standard warranty on non-premium consumer monitors requires six or more dark sub-pixel defects before the company will approve a replacement. Samsung's standard defect policy applies at three or more dead sub-pixels. ASUS standard lines use a threshold of five or more defects in the center zone. These numbers are why documenting the exact count and on-screen location of every defect before contacting support matters: a two-pixel defect on a Samsung may qualify; the same defect on a Dell likely does not.
Always check the specific policy for your monitor model before contacting support. Many retailers maintain their own dead pixel policies that are more consumer-friendly than the manufacturer's base standard, particularly within the first 30 days.

Can dead pixels be fixed?
A truly dead pixel, one that appears permanently black because the liquid crystal cell itself has failed, cannot be repaired by any software method. There is nothing a browser tool, a driver update, a monitor setting, or any app can do to revive a cell that has stopped working at the hardware level.
Stuck and hot pixels are a different situation. The stuck pixel fixer at ToolCenterHub rapidly cycles colors over a region of your screen, sending the affected pixels through thousands of color changes per second. For pixels that are stuck because a transistor is jammed in one state rather than physically broken, this rapid switching can sometimes jar the transistor back into normal operation.
To use it, open the tool and drag the target box over the area where you found the defective pixel. If you are sensitive to rapidly flashing lights or have photosensitive epilepsy, do not use the rapid color-cycling method. Set it running and let it cycle for at least ten minutes. Some stuck pixels respond within the first few minutes. Others take longer. A pixel that has not responded after thirty minutes of continuous cycling is unlikely to respond at all.
The method has no risk of damaging the panel further. It is pure software that drives the display signal, not a physical intervention. Running it costs nothing and takes no skill. It should always be the first thing you try when you find a stuck or hot pixel.
The pressure method and why to be cautious
The pressure method involves pressing gently on a stuck pixel area with a soft cloth while the display cycles colors. The idea is that light physical pressure can jar the frozen transistor back into working order.
It does occasionally work. But it introduces real risk that the software method does not. LCD panels are more fragile than they appear. Uneven or excessive pressure can crush the liquid crystal layer around the contact point, creating new dead pixels in the area you were trying to fix. A single stuck pixel can become a small cluster of permanently dead ones.
If you decide to try it, fold a microfiber cloth into a tight point, apply the lightest possible pressure directly over the defect, and move the cloth in a slow circular motion for 10 to 20 seconds. Do not press hard enough to see any distortion in the display image.
Do not attempt the pressure method on OLED displays under any circumstances. The organic material in OLED panels is significantly more fragile than LCD panels and direct pressure is much more likely to cause permanent damage than to help.
Try the software tool first. Only consider physical pressure as a last resort when the software method has already failed and the monitor is already out of warranty.
When to file a warranty claim
If the test reveals dead or stuck pixels and you are still within the retailer's return window, return the monitor. This is the simplest path. You do not need to negotiate; you simply exercise the return policy.
If you are past the retailer return window but within the manufacturer's warranty period, contact manufacturer support. Prepare the following before you reach out:
- A photograph or short video of the defect against the solid color background that makes it most visible
- The monitor's model number and serial number, found on the sticker on the back panel
- The approximate on-screen location of the defect, described clearly ("center of screen, 3 cm left of middle, 2 cm below top third")
- Your purchase date and proof of purchase
Some manufacturers ask you to run their own diagnostic before they process a claim. Running the test through their tool alongside the dead pixel test you already ran is straightforward, and the results will match if the defect is real.
Center-screen defects, clusters, or defects that affect multiple colors strengthen your claim. A single edge pixel on a Class II panel may not qualify for a free replacement under the manufacturer's standard terms, but it is still worth making the request.
How to avoid causing pixel damage yourself
Most dead pixels are manufacturing defects that exist from the moment the panel is made. You did not cause them and could not have prevented them. However, there are ways to create new pixel damage after the fact.
Physical pressure on the panel surface is the most common cause of user-induced damage. Pressing on the screen to point something out, resting items against the face of the monitor, or storing the monitor face-down under weight can all crush pixel cells.
Improper shipping or transport is the next most common cause. Always keep a monitor upright during transport, or pack it in its original foam packaging if you are moving it. Laying it flat in a car boot with other items stacked on top is a reliable way to return home with a cluster of new dead pixels.
Screen burn-in is a separate issue that primarily affects OLED displays. Displaying a static image for an extended period can leave a persistent ghost impression. This is not technically a dead pixel, but the result is similar: an area that does not display correctly. Use screensavers or automatic display sleep settings if you own an OLED monitor.
Other display tests worth running at the same time
While you are checking for dead pixels, two other tests take less than a minute each and cover common problems that go undetected on new monitors.
The refresh rate test verifies what frame rate your display is actually outputting, not just what Windows is configured to send. Many high-refresh panels ship with Windows defaulted to 60Hz. A monitor rated at 144Hz running at 60Hz is extremely common and easy to miss. A full breakdown of how to check and change the refresh rate on Windows, Mac, and Linux is covered in the guide to checking your monitor refresh rate.
The touchscreen test is worth running on any touch-enabled display to confirm all touch zones are active and that multi-touch input registers correctly across the full screen area.
All of these tools run directly in the browser at the developer tools hub. No downloads, no accounts, and no software installation required.