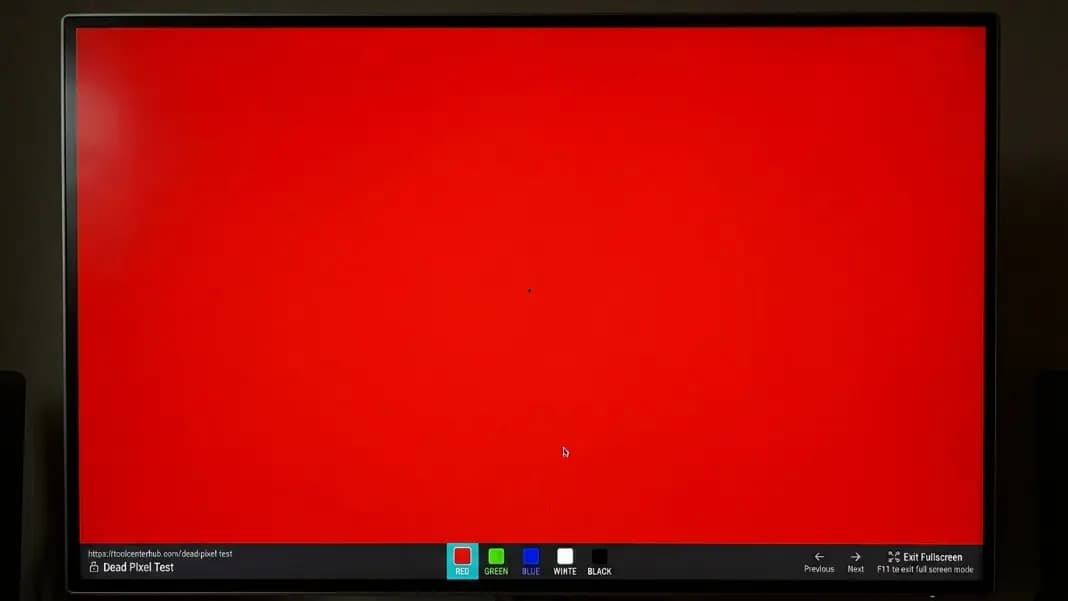
The 2017 MacBook Pro has a dead pixel problem that is documented, consistent, and well understood within repair communities. If you are seeing dead pixels on a MacBook Pro 2017, you are almost certainly not dealing with a random one-off defect. You are dealing with the result of a specific design decision Apple made about the display cable and hinge geometry, and the failure pattern is predictable enough that repair shops see it on a regular basis.
Before contacting Apple or booking a repair, confirm what you are looking at. Open the dead pixel test in Safari or Chrome, press Command + Control + F to go fullscreen, and cycle through each solid color. This tells you whether you have a dead pixel, a stuck pixel, or a partial cable failure showing up as a line or column, and that distinction changes what you should do next.
Why the 2017 MacBook Pro Specifically Has This Problem
The root cause is the display flex cable and the hinge geometry on the 2016 and 2017 MacBook Pro models.
The display flex cable connects the MacBook's logic board to its screen. On the 2017 MacBook Pro, this cable routes through a tight bend inside the hinge mechanism. When the lid is open, the cable bends at a certain angle. When the lid is closed, it bends back. Every open-and-close cycle puts mechanical stress on that specific bend point.
Laptop display cables are designed to handle repeated flexing. The problem with the 2017 MacBook Pro is the bend radius. Apple made the hinge unusually slim on the 2016-2017 design, which compressed the routing path for the cable. Over thousands of open-close cycles, typically somewhere between 1,000 and 2,500 for daily-use machines, individual copper conductors inside the cable develop micro-tears or lose reliable contact with the connector.
When a conductor that carries the signal for a specific column of pixels is compromised, the pixels in that column lose their signal. Some go dark as dead pixels. Others may appear as stuck pixels if the signal is intermittent rather than completely cut. In more severe cases, a whole column fails as a vertical dead pixel line from the top of the screen to the bottom.
This is not a manufacturing defect in a particular batch of cables. It is a geometry problem that affects most 2017 MacBook Pro units that see regular use over several years. The 2016 model with the same hinge design shows the same pattern.
Apple addressed a related display failure called the stage light effect on the 2016-2017 13-inch MacBook Pro without Touch Bar through a free service program. That program was specific to backlight failures, not dead pixels from cable degradation. Dead pixel cases were handled individually through warranty or paid service rather than a formal replacement program.
How to Test Your MacBook for Dead Pixels
The test takes about three minutes and tells you exactly what you are dealing with before you spend any time or money on a fix.
Open the dead pixel test in your browser and press Command + Control + F to enter fullscreen. This removes the browser interface and fills your entire MacBook display with each test color.
Cycle through black, white, red, green, and blue. For each color, scan the whole screen methodically. Start at the top portion of the display, near the hinge side, because that area is closest to the cable routing and is where failures appear first on the 2017 model. Then check the center and all four corners.
Dead pixels appear as black dots on every light background and are invisible on black. A dot that is visible in any color on the black background is a stuck pixel rather than a dead pixel, and stuck pixels have a recovery option that dead pixels do not.
If you see a clean vertical line running from the top of the screen to the bottom rather than isolated dots, the cause is a conductor failure affecting an entire column. This is still a cable problem but the evidence is clearer and the repair is the same.
Take photos with your phone showing the defect on at least the white and one color background before going to Apple. Clear documentation speeds up the service process.
What to Try Before Booking a Repair
One step is worth taking before contacting Apple or a repair shop.
Run a stuck pixel recovery attempt first. Some dots that look like dead pixels are actually stuck pixels where the transistor is working but the liquid crystal is frozen in one state. You cannot always tell them apart visually without testing both. Open the stuck pixel recovery in the dead pixel test tool, position it over the affected area, and let it run for 20 to 30 minutes while the laptop is plugged in.
If the dot changes color or disappears during the cycling, it was a stuck pixel and you have recovered it without any hardware work. If it shows no change after 30 minutes of continuous cycling, it is a genuine dead pixel from cable failure and software will not help further.
Also check whether your machine qualifies for any active Apple service program. Apple's service programs are updated periodically. Search "Apple service program MacBook Pro [your model year]" before your appointment, or ask an Apple Store technician directly. For documented systemic issues, Apple has extended service coverage beyond the standard warranty period on multiple occasions.
What Apple's Coverage Looks Like
Under the standard one-year warranty, or under AppleCare or AppleCare Plus, Apple replaces the display assembly for dead pixels when the cause is a hardware defect rather than accidental damage. For the 2017 MacBook Pro, Apple typically treats flex cable degradation under normal use as a hardware concern rather than user damage, which means it can qualify for coverage in some cases even on machines slightly past the standard warranty window.
At an Apple Store, show the dead pixel on the white test background, explain when it appeared, and request a Genius Bar assessment. If the machine falls under any warranty coverage or active service program, Apple quotes the repair cost before proceeding. Genuine hardware defects on in-coverage machines are typically repaired at no charge.
Apple replaces the entire display assembly rather than individual components. This means the repair restores the screen to original quality and comes with a 90-day service warranty on the work.
The dead pixel test guide covers how Apple's dead pixel policy compares to ISO 13406-2 standards and what the typical per-brand replacement thresholds look like for other manufacturers if you are comparing policies.

Third-Party Repair vs Apple: Cost and What You Give Up
Out of warranty without AppleCare, Apple charges $480 to $600 for a 2017 MacBook Pro 13-inch display replacement and more for the 15-inch. This uses Apple genuine parts and comes with a 90-day repair warranty. You get a display that matches the original color profile and brightness exactly.
Third-party repair shops typically charge $200 to $350 for the same repair using aftermarket or refurbished display assemblies. Quality varies. A well-sourced aftermarket display matches the original closely. A cheap panel may have different color temperature, lower brightness, or a slightly different form factor that introduces minor gaps in the housing.
When choosing a third-party shop, prioritize those that:
- Have specific experience with MacBook Pro display replacements
- Warrant their parts separately from labor, typically 90 days or more
- Can show you the replacement panel before installation, or name the panel manufacturer
DIY replacement is technically possible using iFixit guides and aftermarket display assemblies. The 2017 MacBook Pro display assembly requires heat tools to open safely, the routing of the new cable is precise, and the connectors on both ends are fragile. For anyone without prior laptop screen replacement experience, the risk of introducing new damage is significant enough that professional repair is a better choice.
Dead Pixels on MacBook Air: A Different Cause
MacBook Air dead pixels occur, but the specific 2017 MacBook Pro flex cable failure pattern does not apply to Air models.
MacBook Air designs from 2020 and earlier used different hinge geometries with more cable routing space. Dead pixels on those models are more often caused by isolated manufacturing defects in the panel or by physical pressure, such as a book or object pressing against the closed lid in a bag over time.
The M1 and M2 MacBook Air use a different display assembly. Dead pixel reports exist for these models but are not tied to any documented systemic cable failure. They are treated as standard warranty defects and handled case-by-case through Apple service.
Testing is the same on any Mac: run the dead pixel test in fullscreen, cycle through all colors, and document what you find before contacting Apple. If the machine is in any warranty period, Apple's response is consistent regardless of which specific model you have.
Out of Warranty with No AppleCare: Your Realistic Options
A 2017 MacBook Pro is now outside Apple's standard warranty period. Without AppleCare, your choices are third-party repair, living with the defect, or replacement.
Third-party repair at $200 to $350 is the practical path for a machine you rely on daily. Get two or three quotes from local shops and ask specifically whether they have done 2017 MacBook Pro display replacements before. This is a routine job for shops that work on Apple hardware regularly, and an experienced technician has seen this cable failure many times.
If the MacBook has additional hardware issues alongside the dead pixels, factor the total repair cost against what the machine is worth. A 2017 MacBook Pro in working condition is worth $350 to $600 depending on storage, RAM, and condition. If combined repair costs exceed that, replacement may be the better long-term choice.
For the dead pixel test and all other display diagnostic tools, the developer section has everything you need in one place.